


If you already have some experience using ARCserveIT, you will be able to scan media using these steps.
1. Select the Scan icon from the ARCserveIT server's home page.
All Scan operations start from the Scan Manager window.
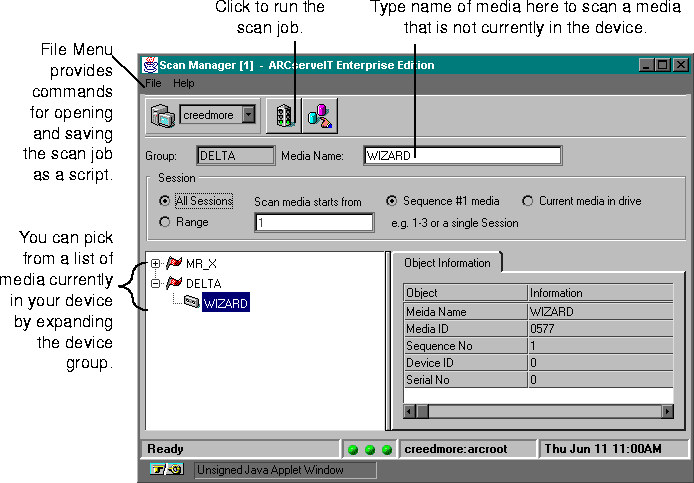
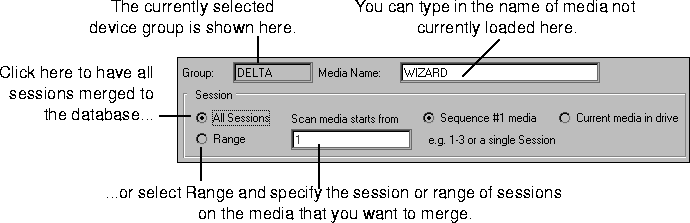
2. Specify which media you want to scan.
If the media you want to scan is not currently in a Media device, enter the name of the media you want in the Media Name field. ARCServeIT will prompt you for the media once the job begins.
3. Indicate if you want to scan every session on the media or only a specific session.
If you want to scan all information from the media, select the All Session option. The default when selecting this option is for ARCserveIT to scan for only the first sequence on any given media or set of media. To scan all of the currently loaded media, select Current media in drive.
If you know the session(s) you want to scan, then you can select the Range option and specify the session or range of sessions.
4. Select the Submit button to run the job.
The result of the scan job will be displayed within the Job Status's Job Log, and within the Activity Log file. Both of these log files are viewed via the Report Manager.
For information on creating an additional log for the job, as well as setting additional options for both merge and scan jobs, see `Merge and Scan options'