All RealServer settings are customized through the RealSystem Administrator. This chapter describes how to use RealSystem Administrator as well as the basic settings used by all RealServers.
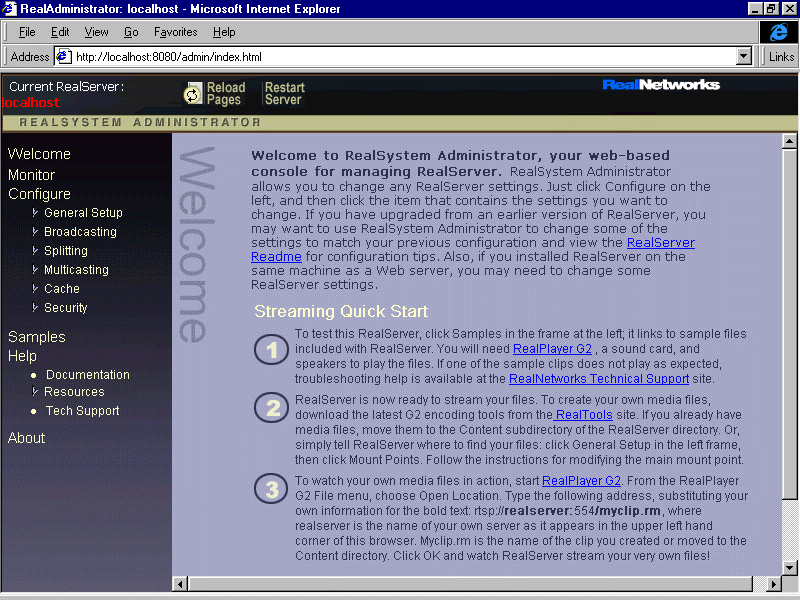
When the RealServer installation program completes, it asks if you want to run RealSystem Administrator. If you choose yes, RealSystem Administrator displays. To make changes to any feature, click on the appropriate category listed under Configure. Make the changes and click Apply.
You can view the configuration of your RealServer from nearly any browser on your network. Compatible browsers are Netscape Navigator version 4.0 or higher and Microsoft Internet Explorer version 4.0 or higher.
http://realserver.company.com:AdminPort/admin/index.html
realserver is the name the machine on which RealServer is installed.
company.com is the name of the domain in which RealServer exists.
Or, rather than typing the name and domain of the system on which RealServer is installed, you can type the IP address.
AdminPort is the port which RealSystem Administrator uses to connect to RealServer. You are asked for a port number during setup. Use that port number here.
The following URL will start RealSystem Administrator if it is typed in the browser on the same computer as RealServer (be sure to substitute your port number for AdminPort):
http://127.0.0.1:AdminPort/admin/index.html
The following command also works on the same computer:
http://localhost:AdminPort/admin/index.html
Once you have started RealServer and then RealSystem Administrator, you can change RealServer features with the instructions below:
RealSystem Administrator makes the changes to the configuration file.
To ensure that only certain people can use RealSystem Administrator to make changes to RealServer, you can authenticate all connections to RealSystem Administrator. Instructions are given in "RealSystem Administrator User Authentication".
Changes made with RealSystem Administrator are stored in the configuration file. It is a text file formatted with tags which are based on XML (Extensible Markup Language). This language introduces great flexibility to the configuration file format and allows third-parties to use this file and add to its functionality. Syntax of this file is given in Appendix B: Configuration File Contents.
Be sure that your configuration file is stored where only authorized users can make changes to it.
|
|
Tip |
|---|
| Keep a backup copy of the configuration file. You may need it if you make changes to this file that you later want to undo or if you accidentally delete the working copy. |
You can change the RealServer settings by opening the configuration file with any text editor. You can also add variables that aren't included in the initial file, but are listed in this manual in Appendix B: Configuration File Contents. In addition, third-party plug-ins may require their own parameters and variables. Use a text editor to add them to the configuration file.
To make changes to existing settings in this file is simple; this manual provides guidance. If, however, you plan to add new sections, you will need to understand the syntax of the entire file. The file is organized into sections. This is not strictly necessary, but helps with clarity. The structure of the configuration file is described in detail in Appendix A: Configuration File Syntax.
The default name of the configuration file is rmserver.cfg, but if you have multiple servers you may want to rename the files so as to easily identify which server you're working with.
When you edit the configuration file manually, be sure to use correct syntax, because RealServer looks for exact spellings and correct use of angle brackets. RealServer does not display messages related to syntax errors; instead, it will ignore those settings it does not understand. It may use minimal settings. See the "Minimum Settings" table.
|
|
Note |
|---|
| Always restart RealServer after changing any settings in the configuration file with a text editor. |
RealSystem Administrator shows the configuration file settings of the RealServer configuration file in use; use caution if you are switching between manually editing the file and using RealSystem Administrator to edit it.
|
|
Warning |
|---|
| Exit RealSystem Administrator before opening the configuration file with a text editor or unexpected changes may result. |
Regardless of which features are in use, certain powerful settings apply to every RealServer. They are described in this section.
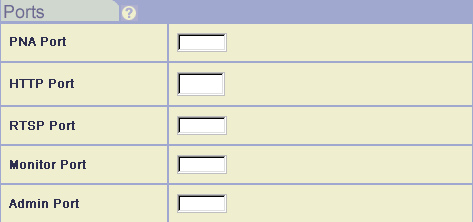
Port settings tell RealServer where to listen for requests. Ports are described in detail in Chapter 2: Overview.
If your RealServer and Web server are on the same machine, you may need to modify the HTTP Port setting. See "Running Web Servers and RealServer on the Same System" for additional information.
|
|
Warning |
|---|
| If you change the port settings from their default values, you must also change the links to show the port numbers. |
pnm://) by typing the correct value in the PNA Port box. The default value is 7070.
Previous versions of RealSystem used this protocol. If you have Ram files from older versions of RealSystem that use URLs that begin with pnm://, be sure to include this setting.
8080.
rtsp://) by typing the correct value in the RTSP Port box. At installation, the value is 554.
|
|
Note |
|---|
| To use a port lower than 1024 on a UNIX system, you must be logged on as super-user. |
Mount points on this page refer to on-demand clips. For a complete description about the purpose of mount points, see "Mount Points". Mount points in other sections, such as for live material, are described in their respective chapters.
The mount point shown with a single forward slash in the Name list is the mount point for most of the content served by your RealServer.
|
|
Warning |
|---|
| If you change the main mount point itself, you will have to modify any links that include the original mount point. Changing the base path only changes where RealServer looks for content. |
/).
To add another mount point for on-demand content, use the instructions below.