RealServer authentication provides a way for you to control what or who can access your RealServer, whether it is an encoder sending a stream or a colleague perusing RealSystem Administrator or a user viewing content for which they've paid.
Authentication verifies the identity of a user or RealPlayer that makes a request for streamed media. The verification can come in the form of asking for a name and password, or it can be hidden from the user.
You can require a name and password for the following RealServer areas:
The names of authorized users for each item above are stored in separate databases. One database stores the names for the authorized encoder users, another stores names of other administrators, and still another stores names of people who can view presentations. You can set up additional authentication areas and databases.
RealServer will identify requests (in the form of URLs) for secure content by the mount point. The URL must contain the mount point, and it may contain additional directory information. Encoders are an exception to this-RealServer looks at the port number at which live data arrives in deciding whether it should accept the content.
When a user sets up an encoder to send a stream to RealServer, you can require that she supply a user name and password. In this way, only authorized people can send streams to your RealServer.
To protect your RealServer from changes made by unauthorized users, RealServer is installed with authentication turned on for RealSystem Administrator access. RealServer maintains a separate data store of user names and passwords of people who are authorized to make changes to RealServer via RealSystem Administrator.
The most popular use of all is limiting user access to individual presentations or directories of clips.
Like the other methods, one database stores the names and passwords of the users who are authorized to view content. But an additional database can be used to list which content each user can view, and what type of access they have. The default method uses one database for all this information.
The different types of access to an individual clip include watching it a limited number of times, or watching it indefinitely while RealServer merely notes the number of viewings. Other methods are available; they are described in "Clip and Directory Permission Types".
Two "levels" of authentication are a name and password requirement (user authentication), or a transparent type (player validation) that allows you to track visitor activity.
|
|
Additional Information |
|---|
| To limit visitors to RealServer via bandwidth, connection volume, client version, or IP address, use the methods described in Chapter 9: Limiting Access to RealServer. |
RealPlayer versions 3.0 and earlier do not work with authentication and may display an error message. RealPlayer version 4.0 works with player validation only. RealPlayer version 5.0 and RealPlayer G2 support both player validation and user authentication.
Authentication of encoders and RealSystem Administrator users has two components:
Authentication of content users-also known as the commerce feature-adds another piece:
In addition, if you are using player validation, RealServer requires another list.
In the configuration file, each of these four areas is in a separate list.
The four main areas refer to each other, but are kept separate for flexibility. Two separate secure virtual paths might use the same realm (and therefore the same database) to perform the same type of authentication for content kept in different locations. This allows different types of content to share the same list of authorized users.
The components are covered in greater detail below.
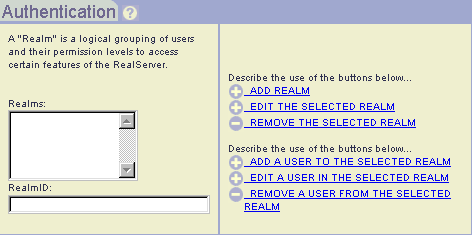
A realm contains information about the type of authentication protocol and the database where the authenticated users' names will be stored. If you will be using Windows NT to authenticate users, the realm lists the type of NT authentication and the NT administrator-defined group name.
RealServer has three methods of authenticating the identity of visitors:
Each realm can use only one authentication method.
If the clients that will be accessing content on your RealServer are RealPlayer version 5.0 and earlier, be sure to use the RealSystem 5.0 style for content authentication.
The Basic Authentication protocol encodes the user's name and password with the Base64 algorithm and sends it to RealServer, which then decodes the password and verifies it.
This protocol sends the user's password over the public internet in a simple manner. Users should use a unique password for this material.
RN5 authentication is RealNetworks' own authentication protocol, developed for RealServer version 5.0.
If your material will be served to users working with RealPlayer version 5.0 and later, use this authentication protocol.
This is a more sophisticated protocol than Basic authentication. It provides better security than Basic because it does not send the password in a manner that can be reversed.
In RN5 authentication, RealServer stores all passwords in an encrypted format. Passwords can be entered and changed through the RealServer Administration page.
To manually change a user's password, the new password must first be encrypted using the mkpnpass tool with the Realm variable from the appropriate list within AuthenticationRealms, then copied into the appropriate field in the authentication database or text file.
The password tool is a command line utility. It is located in the RealServer Bin directory.
mkpnpass username realm
username is the user name exactly as it is entered or will be entered in the authentication database or text file.
realm is the value of the Realm variable specified in the relevant list. For encoders, this is given by Authentication Realm on the Broadcasting G2 Encoders page in RealSystem Administrator. (In the configuration file, it is given by the value of the Realm variable in the G2_Encoders list.)
For RealSystem Administrator users, use the value of the Realm variable in the RealAdministrator_Files list within the FSMount list in the configuration file. (You must open the configuration file itself to see this value.)
The resulting encrypted password is displayed on the screen.
RealServer encrypts passwords with the MD5 hashing algorithm. It uses the form MD5("username:realm:new_password"). On BSD systems and some other UNIX systems, you can generate these passwords with the following command:
echo -n "username:realm:new_password" | md5
For sites that use an NT-based security model, popular on corporate intranets, this method allows RealServer to use the existing NT database of user groups and permissions. It also allows access control of content via NTFS file permissions. The NTLM Authentication protocol uses Windows NT authentication.
This method is only available to systems using Windows NT, and requires that RealServer itself be installed on an NT Server. For authenticating content, it also requires Microsoft Internet Explorer and RealNetworks RealPlayer.
Use the instructions below to create a realm.
|
|
Additional Information |
|---|
| Information on setting up databases is in "Setting Up a Database". |
Use the following instructions to add to the list of authorized users in a particular realm.
|
|
Note |
|---|
| NTLM users must be managed using tools supplied by Windows NT. |
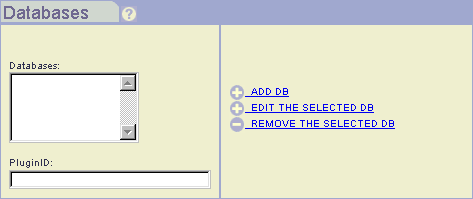
The list of databases groups database interfaces and the locations of databases. RealServer includes three database interfaces:
They are described in greater detail below.
The authentication package contains templates for common databases, including mSQL and common ODBC-compliant databases. Users can also work with databases for which templates do not exist, by setting up the data source with the appropriate table structure.
The mSQL database is generally used on UNIX.
The text file method is enabled during installation, as it allows the greatest insight into the access permission structure, but the text file method lacks the flexibility of a full database application.
Follow the instructions below to create the databases list.
rn-db-wrapper.
Based on what you selected, more options may become available. If the database you're using is rn-db-wrapper, fill out the following boxes:
| Function | Windows Name | UNIX Name |
|---|---|---|
| Basic | ppvb3260.dll | ppvbasic.so.6.0 |
| ODBC | ppvo3260.dll | ppvodbc.so.6.0 |
| MSQL | ppvm3260.dll | ppvmsql.so.6.0 |
The virtual path in the URL tells RealServer that this request should be authenticated before allowing access to the clip or presentation.
To protect access to content, you add the virtual path to the list of Authenticated Mount Points.
The links to on-demand authenticated content are just like the links to other on-demand content, with the addition of the Protected Virtual Path substituting for the virtual path.
The Protected Virtual Path refers to a virtual path. Consider the following directory structure:
(RealServer main directory)
                                    Content
                                              Speeches
                                                          President
                                                                     Executives_only
In this example, if you want to authenticate the final directory on the list, Executives_only, add the following virtual path to the Protected Virtual Path list (assume that the main mount point is / and is defined as the RealServer Content directory):
/Speeches/President/Executives_only
When you install RealServer, you supply a user name and password. These are added to the administrator database and the encoder database. Users of RealSystem G2 encoders must supply this user name and password to connect. You can add or change user names and their password.
A realm to use for encoders is included with your RealServer installation, named EncoderRealm. If you want to use a realm which does not yet exist, see "Setting Up a Realm".
Older encoders can supply a password, and it must be the same for everyone. If you change the password, be sure to tell everyone who will be connecting what the new password is.
During installation, you are prompted for a word to use for this password. If you change the value of the password here, be sure to inform everyone who is sending live data to you.
At installation, RealServer is configured to prompt all RealSystem Administrator users for a user name and password. Use the user name and password you entered during Setup.
Authentication is enabled at installation. To turn it off, you must modify the configuration file directly. See Appendix B: Configuration File Contents.
To add other users to the database of names, use the instructions in "Adding User Names to Realms".
There are several more options in setting up content authentication than for encoder or RealSystem Administrator user authentication.
To levels of verification are available: player validation requires a user name the first time the user registers. Thereafter, RealServer does not ask the user for a user name or password. The player ID is associated with the original user name, no matter who is using the player.
User authentication requests the user's name and password each time the user clicks a link to secure material.
When you want to verify user identity before permitting access to a clip or directory, choose user authentication. With user authentication, it does not matter which computer a visitor uses to connect to the Web site. User authentication access privileges can be set by the administrator before the visitor views the secure media. User authentication is best suited to applications like pay-per-view, executive briefings, and distance learning.
Player validation allows or denies access to individual clients (usually one per computer), rather than to specific people, and authentication is transparent to the visitor-a dialog box warning only appears when the visitor attempts to access content for which he or she is not authorized. This type authentication involves less viewer interaction, but each client must be registered individually by the viewer or central administrator. Player validation is the best way to track requests for specific types of material, such as fan clubs, premium groups, microcommerce, intranet, and demographic tracking.
Step 4 in "Creating Secure Virtual Paths" gives instructions on choosing user authentication. This is done on a per-Protected Virtual Path basis.
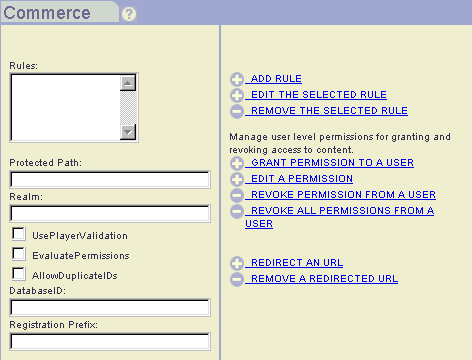
Once RealServer has verified the identity of the user or client, an additional level of verification is available: it can allow access to all files or only to very specific files. Evaluate Permissions controls this; when set to False, it allows general access to all authenticated users or players. When set to True, RealServer performs the additional step of examining the requested URL and looking for it in the database. If the user or player who requested it has permission for that clip or directory, RealServer streams the requested file.
If you'll be looking up permissions for specific files or directories, you must also indicate the database which stores the clip permission information. This database can be the same as the database that stores user names and passwords.
On the Commerce page, clear the Evaluate Permissions box. This setting applies to the rules; you can use a different setting for each rule.
If you selected this box, you must set up the different permissions type for each user and each clip or directory to which you'll be giving them access. See the following section for a list of the different permission types.
Access control features determine how long a user can view a particular presentation. These are indicated in the data storage. There are three types of access, discussed in greater detail below.
A single RealServer can simultaneously deliver multiple types of access for different clips or directories of clips.
In event access, the visitor is granted, in advance, unlimited access to one or more specific media clips.
The process for expiration access follows that of event access, but permission is granted through a certain date (for example, unlimited viewing of any or all of some number of specified videos during the next week).
If the date and time of expiration arrives while the visitor plays a clip, transmission of that clip to the player is stopped, and an error message appears.
In this type the user receives a fixed amount of viewing time (given in seconds) and RealServer subtracts all viewing time from this amount.
Like a taxi meter, this merely counts the number of times the user has played a presentation to which he has been given access. Time spent viewing presentations is noted by RealServer, and the administrator can use this information later for billing purposes. Access is granted per presentation or directory, and is unlimited.
If you are using your own databases, you can modify them directly, without using RealSystem Administrator.
|
|
Note |
|---|
| Give only one type of access to a clip or directory. More than one type causes conflicts. |
Identify which directories contain material to which you want to restrict access.
You can have multiple directories that contain secure material, and they can be in different physical locations.
The default configuration creates one directory which contains all material to be authenticated, usually named Secure. If the secure directory contains subdirectories, append these to the mount point in Protected Virtual Path. For example, the subdirectory of the Secure directory called Earnings would be added to a Protected Virtual Path as /Secure/Earnings/. (Be sure you have added the single mount point as a Protected Virtual Path, or anything you put in the main secure directory will not be authenticated!)
True. Otherwise, when this is set to False, and a user who tries to log in from a different location receives an error message, and must log out at the first location before he or she will be permitted to log in at the second location.
To set up self-registration, you'll need to customize two sets of supplied files: HTML pages containing forms for registration, and .cgi files that connect the .htm files with RealServer and the data storage files.
In its default state, RealServer requires that you add the names of users or clients to the appropriate databases before they can receive secure content. This is feasible if you are administering RealServer over an intranet site. But in case you want to allows users to register themselves via a Web page, some versions of RealServer include a sample CGI program and HTML files that interact with a Web site and your RealServer so that users may register themselves. Check the readme.txt file for more information.
Links to individual on-demand or live streams are the same as their non-authenticated counterparts. See "Linking to Files and Presentations" for more information.
Users are prompted only once per realm for name and password for SMIL files, regardless of how many files in the presentation require a name and password. When the user clicks on a link to a SMIL presentation that contains secure materials, RealServer prompts the player for security information on the first clip. The player then prompts the user for an authorized name and password. The player then stores the information and supplies it when the RealServer asks for security information on remaining clips in that realm.
Should any clip in the presentation expire sooner than the others, the entire presentation will halt. The person viewing the presentation will not be able to continue until more time is allotted by the administrator.
For this reason, it is important that all the permissions on all the files within a presentation be the same.
The best methods of organizing authentication and SMIL files are the following:
This is one case in which giving identical permission to all files (including the SMIL file) will not work as expected.
As each clip is viewed, RealServer subtracts the viewing time from the directory. If each clip is 10 minutes long, and there are three clips in the presentation, RealServer subtracts 30 minutes from the total viewing time. This means that in setting up this type of access, the time allotted must be the sum of all the clips.
Keeping track of all the clips, their lengths, and the total directory access time can be tricky. A better solution is to limit the access time only for the SMIL file.
Authentication works with all other RealServer features. There are few special considerations for each feature, however.
Media cache software makes requests on behalf of clients, and caches the streams it receives. Although the media cache stores the streamed data, it requires a control channel between the requesting client and RealServer. RealServer uses the control channel to request and receive authentication information.
Authentication is performed over the two-way control channel. As long as the client can establish a connection through the firewall to RealServer, all material can be authenticated for clients who are behind firewalls.
If you are sending a stream to a RealServer which is acting as a splitter, you must put copies of all the databases that store authentication information on the splitter. This distributes the authentication load.
Splitting is described in Chapter 8: Splitting and Multicasting.
In both back-channel and scalable multicasts, the user or client is authenticated through the initial control channel connection. Be sure the multicast virtual path is on the list of Commerce Rules.
Both types of multicasting are described in Chapter 8: Splitting and Multicasting.